Hello crafty Friends…. Greetings from me. This is Bela and today on Little Birdie Blog I am very excited to share with you a step by step tutorial of an altered bag. I always used to think why to alter a bag? what not do the same kind of layout on canvas? But when I got an amazing response to my previous altered bag I thought why not make one more. I got lovely compliments from friends on Facebook saying that they loved the bag and how it can be used to gifting without wrapping the gift. they also said the person who receives the gift will get 2 gifts at the same time. The bag and also what inside of the bag !!!

So here’s the step by step to yet another Bag tutorial which is so different from the previous one and yet it turned out amazingly beautiful. Also this will go to my swap partner of August as the theme of the swap was to make some artwork with whatever we have at home. I hope she likes it as much as I Loved making it.

Here I have taken a Domino’s Pizza takeaway bag and added some old book pages here and there for the vintage look. Then I added the texture with steampunk stencil with grainy texture paste which is my favorite from the store. Also added a long piece of off white card stock which I distressed with scissors and added some brown oxide ink for old look.
My next step was to use the MDF leftover from the steampunk cutting and cover the whole thing with black gesso.
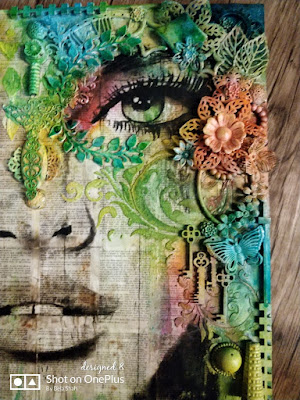
I added the layers of old book, steampunk texture, waste mdf , plain distressed cardstock , corrugated sheet and the vintage picture of a girl which was digitally photoshopped with script that matched totally with my old book script . I chose it as I felt it was so balanced yet very classy and coated with acrylic soft matte gel to protect it. I also added more stenciling with the grainy texture paste on the right side of the picture as it was empty there. also added splatters of white and black gesso everywhere on the bag except the face.
I added the layers of old book, steampunk texture, waste mdf , plain distressed cardstock , corrugated sheet and the vintage picture of a girl which was digitally photoshopped with script that matched totally with my old book script . I chose it as I felt it was so balanced yet very classy and coated with acrylic soft matte gel to protect it. I also added more stenciling with the grainy texture paste on the right side of the picture as it was empty there. also added splatters of white and black gesso everywhere on the bag except the face.
My next step was to add some beautiful yet subtle flowers from little birdie as they not only gave a little feminine touch to the very hardcore mixed media but also made the girl look beautiful as if she had those flowers in her hair. I love that look.
Last but not the least I wanted to add a perfect sentiment for this lovely upcycled piece of art. So I added a perfect sentiment which says HOPE & LOVE MAKE BEAUTIFUL PEOPLE. Isn’t it perfect ? So here’s My beautiful vintage bag which looks super classy with the perfect picture, perfect flowers and a perfect sentiment which really compliments the shabby background.
I really really really hope that you all give this tutorial a shot and send me your versions of it. Thank you for stopping by.
Love & Hugs
Bela


