Monday, May 7, 2018

Make a Wish - An Altered Hoop step by step tutorial


Make a Wish – An Altered Hoop Step by Step Tutorial


Hello Friends,  It’s Bela Shah here, and I’m super happy and excited to be sharing my very first Little Birdie Crafts Design Team Project with you today!


I have always loved doing altered projects and altering a hoop was on my mind since a long time and when I saw Little Birdie flowers in my DT kit, I thought this would be the perfect project to share with you all.
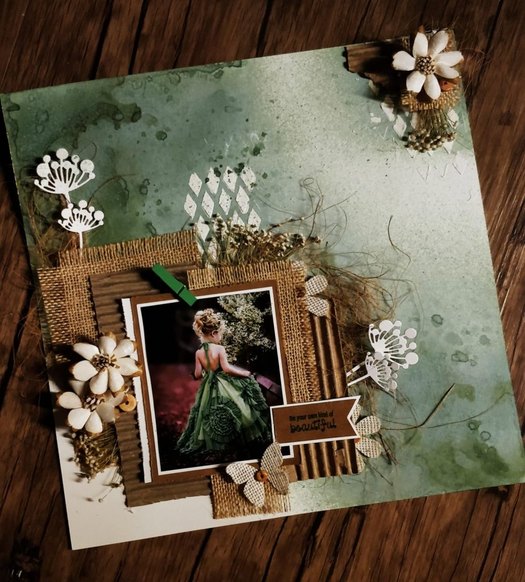
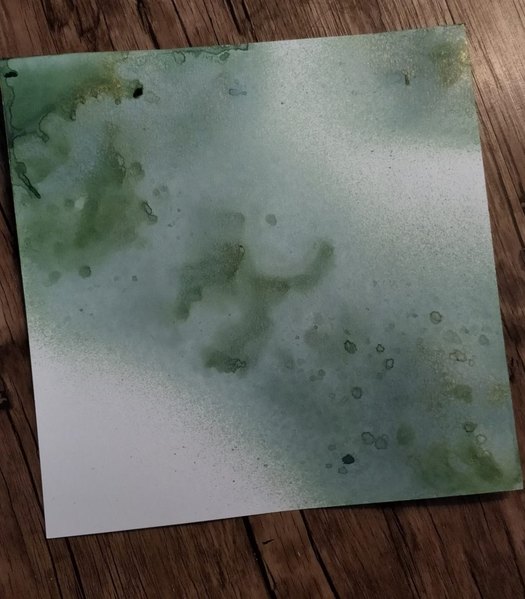
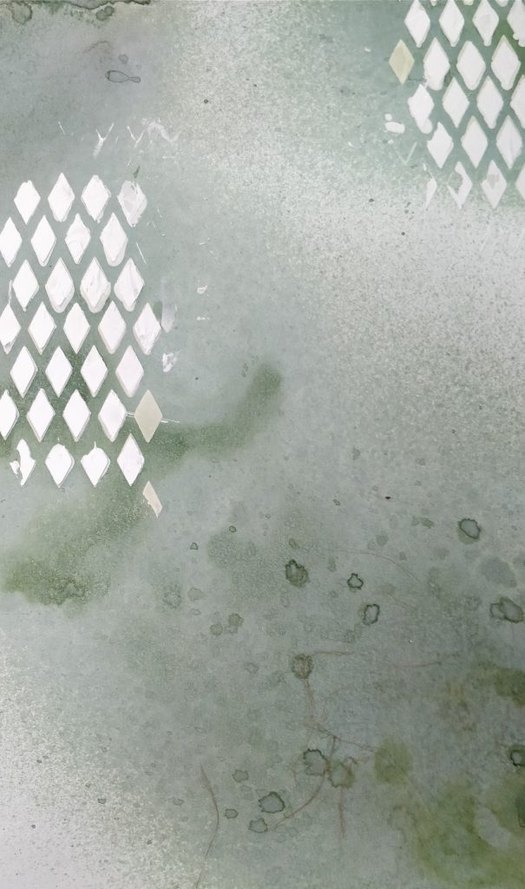
For this altered project, I took three different sized hoop rings and applied gesso on all to prime them. I added Little Birdie Fiber paste for the texture to add interest to otherwise a plain hoop. Sprayed it with Hot Pink color splash. I simply adore the Little Birdie sprays.
After that I traced the ring and cut 300 GSM cardstock for all the three rings as per their size and distressed the edges with brown distress oxide and  adhered it on the loop from back.
I also cut three circles from three different pattern paper from the 12″x 12 ” Watercolor Floral Ballet Paper Pack and distressed the edges with scissors and added brown distress oxides to the edges. To give it more dimension I sprayed some water on the edges and curled them on all three of them.
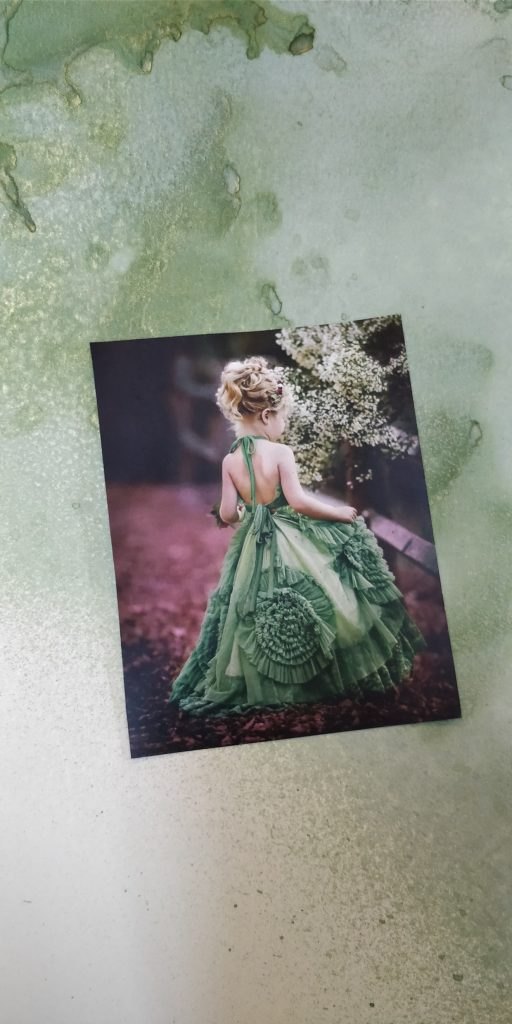
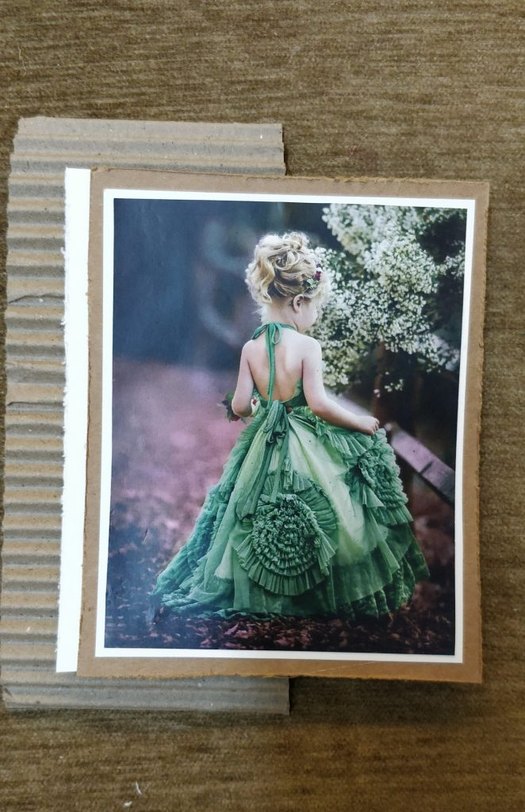
This is how your ring will look after the process. I chose a beautiful picture of a baby girl in 2 different poses as my focal point. I adhered it on a photo mat and distressed the edges . To give a beautiful shabby chic style I used laces from my stash and colored Little Biride Cheese Cloth with Lime Splash Color Spray for extra texture and added them behind the photo for big and medium sized rings.
After all the three hoops were ready, I adhered them using silicon glue, one below the center hoop and the smallest above it. Now it was time to embellish the project with beautiful flowers. I used Margerry Pearl Pink box flowers to enhance mine , added some foliage around and to add more to the shabby chic look I used tissue ribbons in white color behind the flowers.
Now it was time to add sentiment to the project. I used “Make a Wish” chipboard from on the Birthday Wish and splashed it with hot pink color splash directly as these chipboards are already primed and added it on the smallest ring.
You can use this Beautiful shabby chic altered hoop as a Home Décor or gift it to someone and bring a smile to everyone’s face.
I absolutely enjoyed making this one and I have shared easy step by step procedure . I hope this post is creatively inspiring for you all .
Thank you for joining me .
Love & Hugs,
Bela

Supplies from Little Birdie Crafts:


Sunday, April 22, 2018

A beautiful mixed media layout with decoupage papers

Hello friends,
Today I am here to present you with a beautiful layout which I have created using lovely decoupage papers from Nakshathra  Designz...... The moment I saw this particular paper which was floral with the touch of vintage  I knew I will not make the expected article which we usually use decoupage papers for... With this I knew I would create something different which turned out to be super simple and equally elegant. I didn't need to do much as the papers itself was so beautiful. So here's the picture of the beautiful layout I made . I enjoyed making it, I hope you all like it too.


 I have used waste corrugated sheet, distress oxides, mulberry flower petals, pearls, black & white splatters.

I hope you find this art work creatively inspiring . I would love to see your version of it.
Please do leave some love and comments as they are valuable for me and motivate me.

Love & Hugs
Bela


Friday, April 6, 2018

Be your own kind of Beautiful ( mixed media layout)-step by step tutorial

Hey Friends,
Today I am here to present you with one more beautiful layout that I did for Itsybitsy . I absolutely enjoyed making this one ... Absolutely in love with the colors and compilation, love the ways its turned out simple and classy. This is the perfect example which shows that you don't need anything expensive to create a beautiful layout like this one.


Here's the step by step tutorial and the products used to make this layout are listed below:-
         
  1. Natural craft set
  2. Corrugated sheet
  3. Silicon glue
  4. Soft Gel Medium – Matte
  5. Mixed Media Paste – White
  6. Color splash
  7. Handmade Flowers
  8. Coconut Fiber
  9. Die-cuts
  10. Dry fillers
  11. Distress ink
  12. Sentiments Clear stamps
  13. Archival ink

Step 1: For this beautiful layout I have made my own background paper. Take a 12×12 Inch 270gsm Iris paper. Now spray it with the color splash from the top left side corner till right bottom side corner. I added little color to the top right-hand corner to and let the splash do its magic. This is how it should look after you are done.


Step 2: Select a photograph of your choice that you wish to make the focal point of your project. I have used a picture of a cute little girl (free stock photo). Do not paste the picture now. We will create a layered base and paste it in the center of our layout in the end.


Step 3: Now I have used Mixed Media Paste – White for doing stenciling in the center and right hand top corner of the page. I used diamond shaped stencil from Itsy Bitsy. Feel free to use any stencil of your choice.


Step 4: Now let’s put together the layered base for our photograph. Take a thick brown cardstock and stick the photograph on it. For the second layer, I have used a piece of off-white cardstock. The third layer is made from corrugated sheet, placing it slightly outside the photo mat (layer 1 & 2). Refer image for the final look of the layered base.


Step 5: After this I used the burlap cutouts/ pieces from the Natural Craft Set, behind the corrugated sheet in different bits n pieces till I was happy with the arrangement. You can add more corrugated sheets or layers. I added small pieces of burlap on the right hand top corner too. Used the coconut fiber for finer details and to give it a shabby chic look.

Once you are happy with the arrangement and placement of the layers, embellish the layout with buttons, burlap flowers, burlap butterflies and die cuts. I have used dried fillers from my stash.

Finallly, add a sentiment of your choice – I have used a sentiment clear stamp “Be your own kind of beautiful” on white cardstock with  green archival ink. Add more layers to it if you wish. Distressed all the edges with brown color ink for a finished look.


Hope you all like it and get inspired with it to create something equally beautiful for yourself.

Love & Hugs
Bela 

The Positive Vibes Hop - BLESSED - An Altered Telephone in Mixed Media Pictorial

Hello !!! I am Bela shah. Welcome to The Positive vibes hop. The purpose of our blog hop is to start the new year on a colorful & ...