
This is Bela and I hope you all are killing this summer heat with Crafting!!!
I feel there's nothing better than feeding your creative passion this summer. With Itsy Bitsy bringing so many amazing new products at equally attractive discounts why not take advantage and create something for your home or for gifting someone?
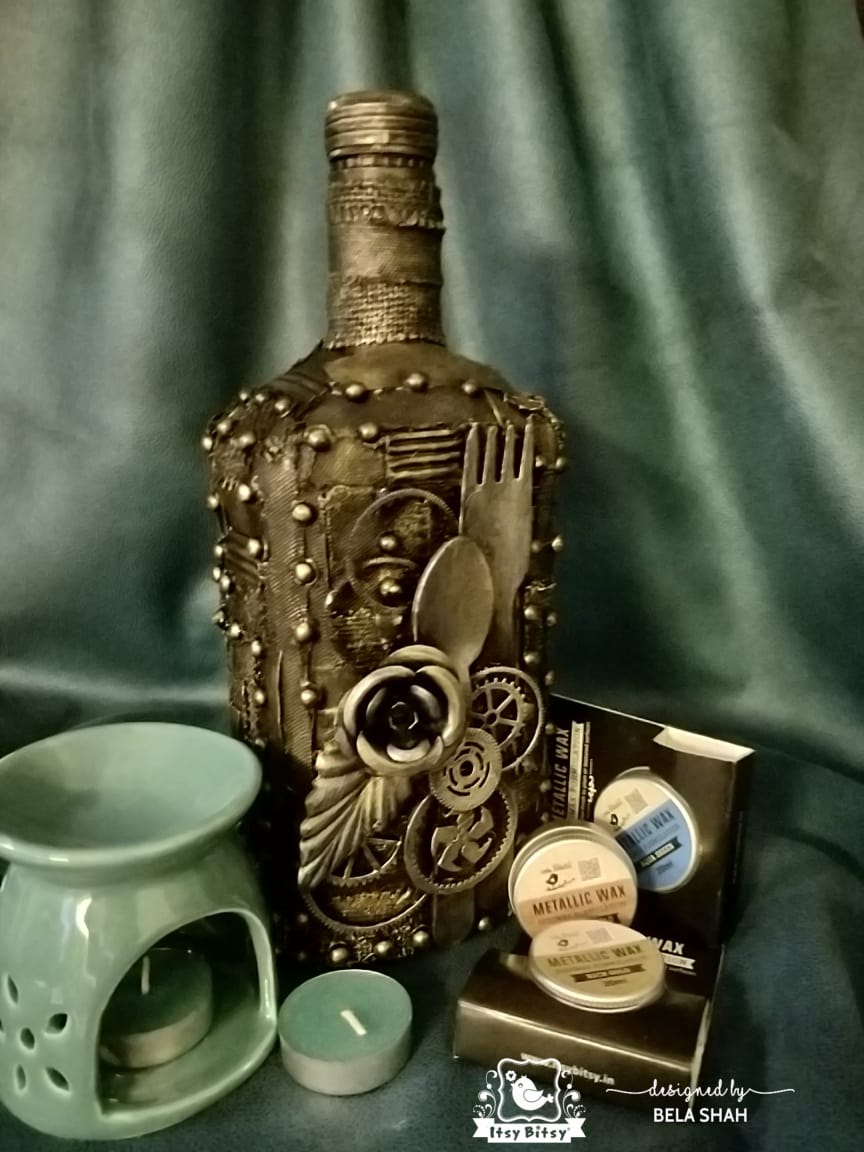
Today on blog I am here with a cool mixed media tutorial which will enhance a corner of you home and can be a precious little gift.
So lets get into the step by step tutorial and see how we turn this empty bottle into a stunning mixed media home decor piece.

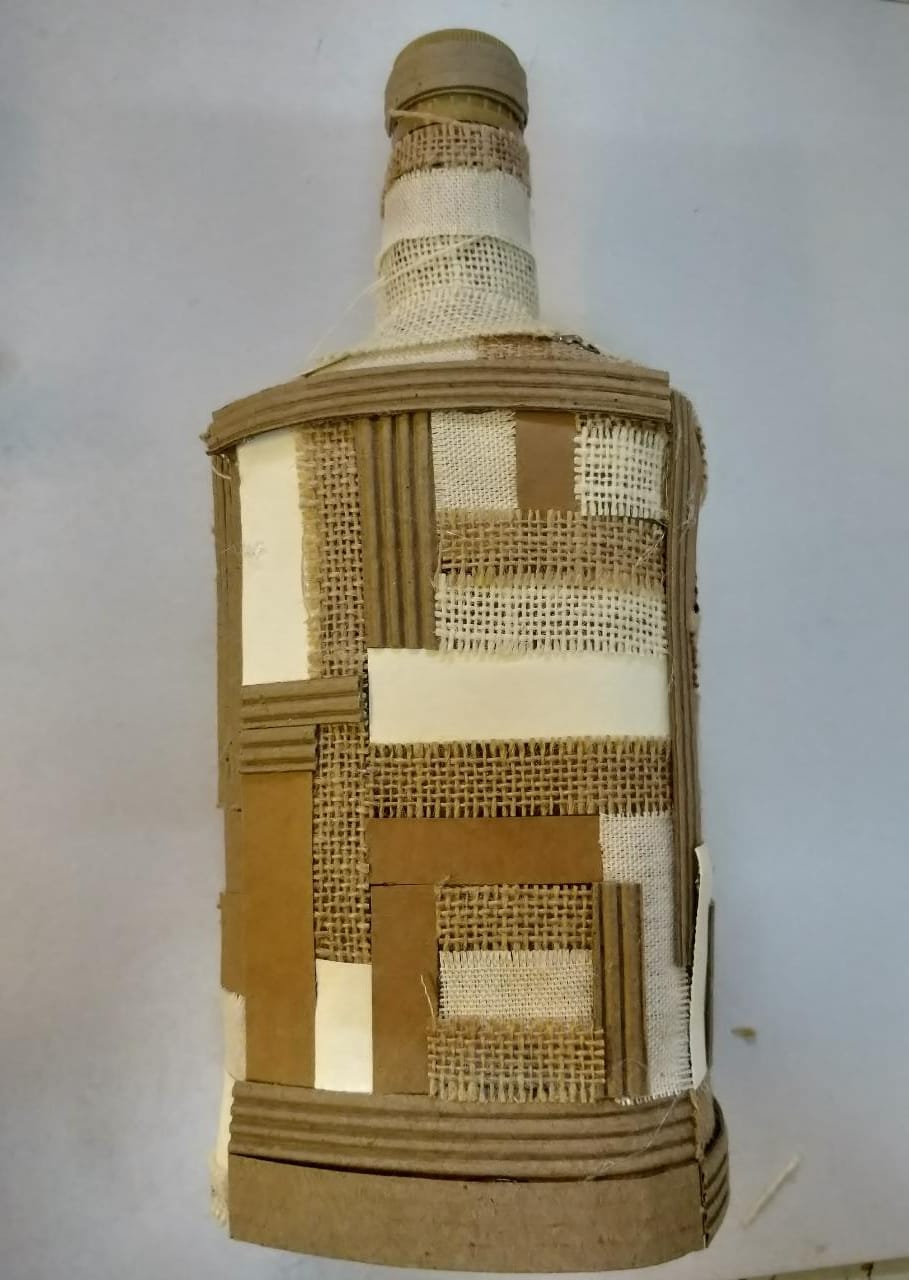
I took this empty bottle and removed the label by soaking it in warm soapy water. After few minutes the label came off easily. I dried it completely and started adhering the mixed media strips with heavy gel medium (jute amd burlap) and soft gel medium (card stock, corrugated sheet and handmade paper) in pieces.... long and short, horizontal and vertical.
If you are wondering what are mixed media strips?
This comes in a pack. It contains some strips of handmade paper, corrugated sheets, burlap, jute, card stock etc.... the best part about these strips is that they are created from extra pieces and are put to good use. These can be used to create something beautiful rather than generating more waste. I simply love the idea.
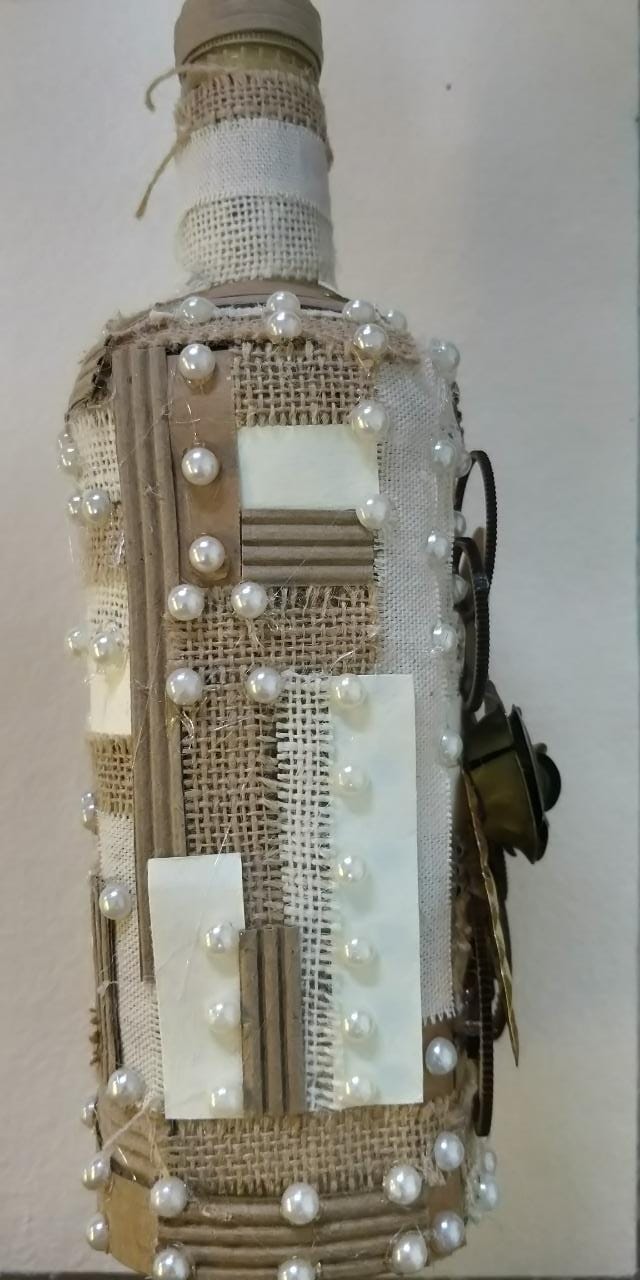
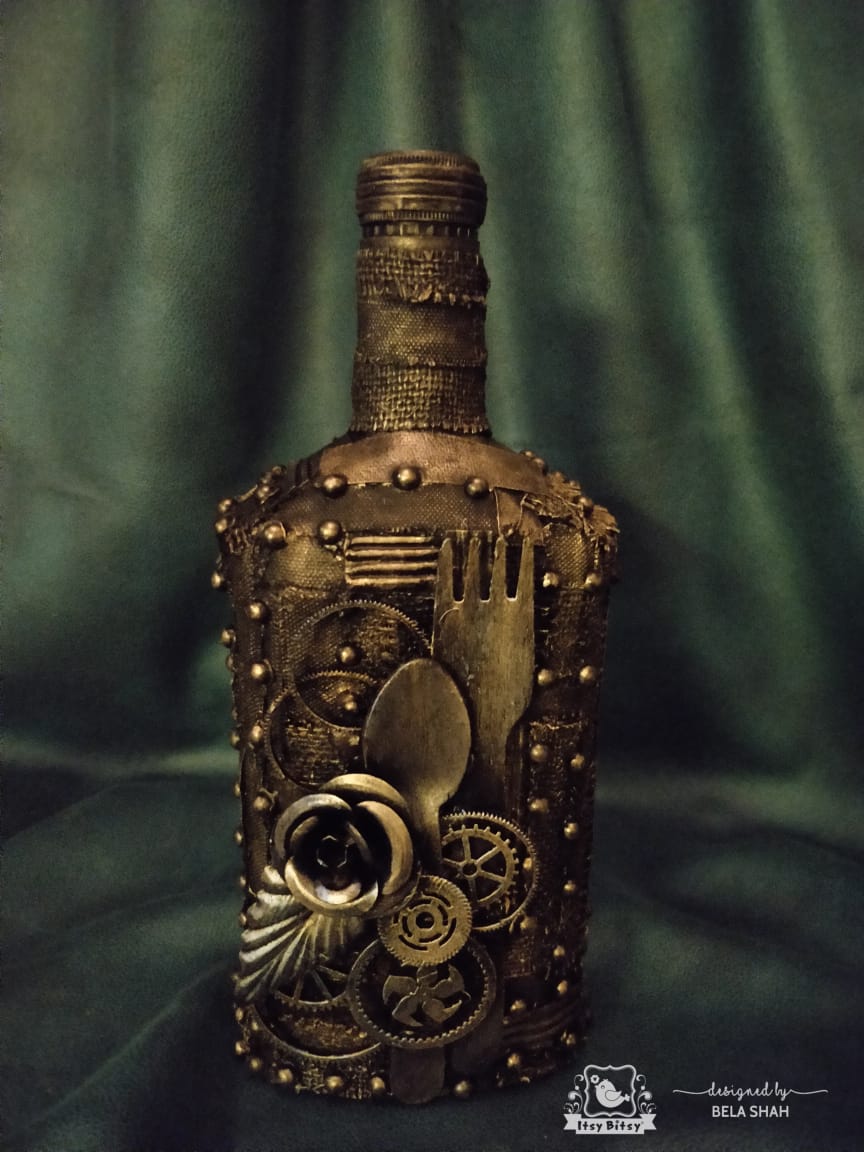
The second step is to add embellishments to the front portion of the bottle. I used a disposable spoon and fork as my main element and added few cogs, metal flower, and a metal leaf to enhance the front of the bottle. To stick all these elements I used heavy gel medium.

I added pearls here and there according to the strips ( vertical/horizontal ) to give it a mechanical look.
Once all the pearls and my embellishments were properly adhered I started priming the bottle with black Gesso. I let it dry completely before going on to the next step.
Now, this is where I played with the latest release from Little Birdie which was one of the most awaited products.... Metallic waxes!!
Metallic Waxes are formulation of acrylic pigments with beeswax. This formulation allows smooth application of the pigment onto the desired surface. Another plus point is that you don't need to be master at dry brushing. Plus to add these waxes we don't need water or brushes or palette. Just your fingers can do the magic!
I started taking a small quantity of the wax on my fingers and started rubbing it on to the bottle. The amazing thing was seeing all the textures come to life again....as they were flattened by black gesso. The beautiful textures of corrugated sheet, burlap, jute, handmade sheet pearls and embellishments started looking absolutely gorgeous. To achieve the look of the bottle, first I used Antique Gold wax all over the bottle. Then I used Rich Gold metallic wax on the pearls and the embellishments to give them more shine. I also rubbed on a little blue colored wax only on the flower and leaf.
I made sure that the waxes were totally dry between two color applications.
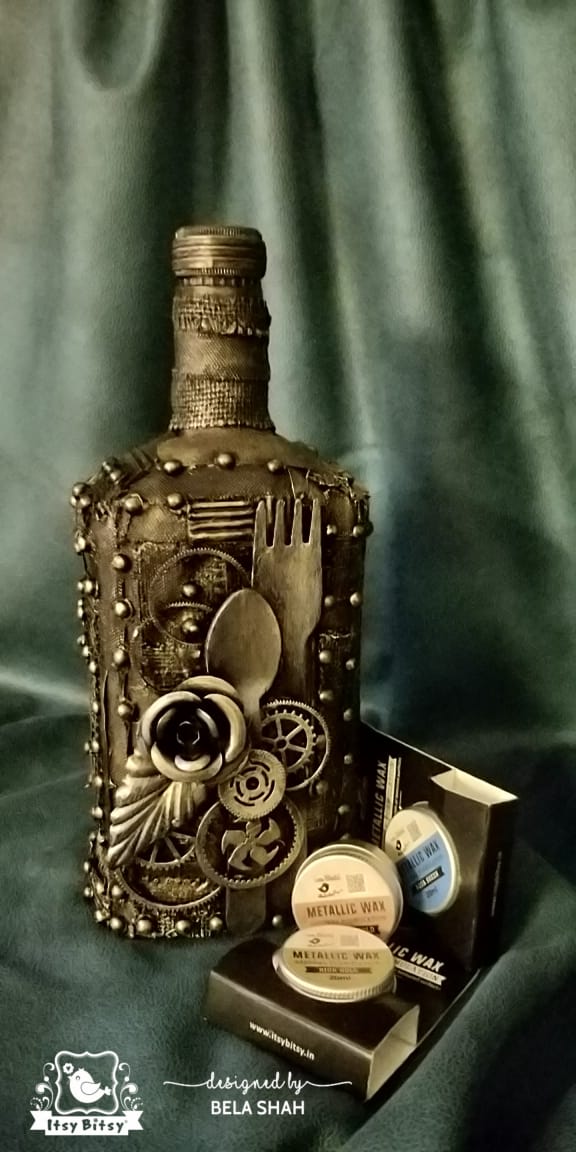
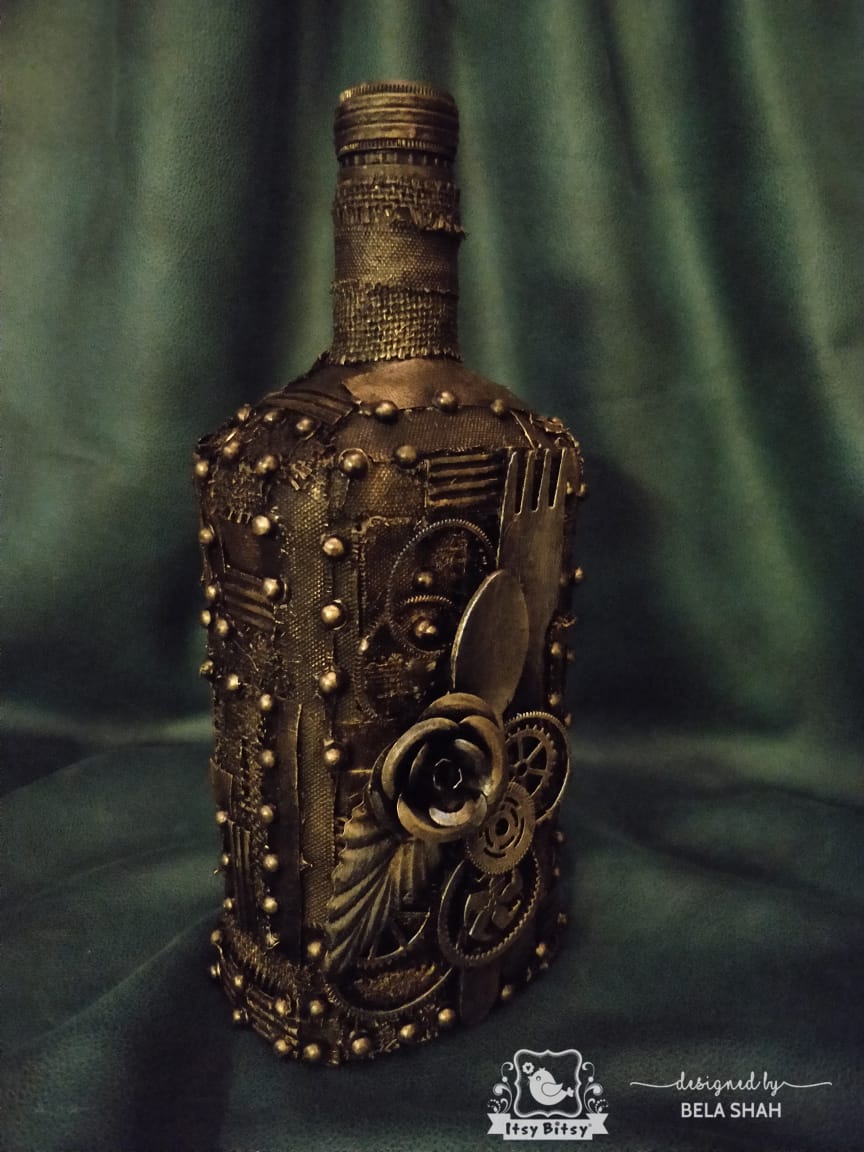
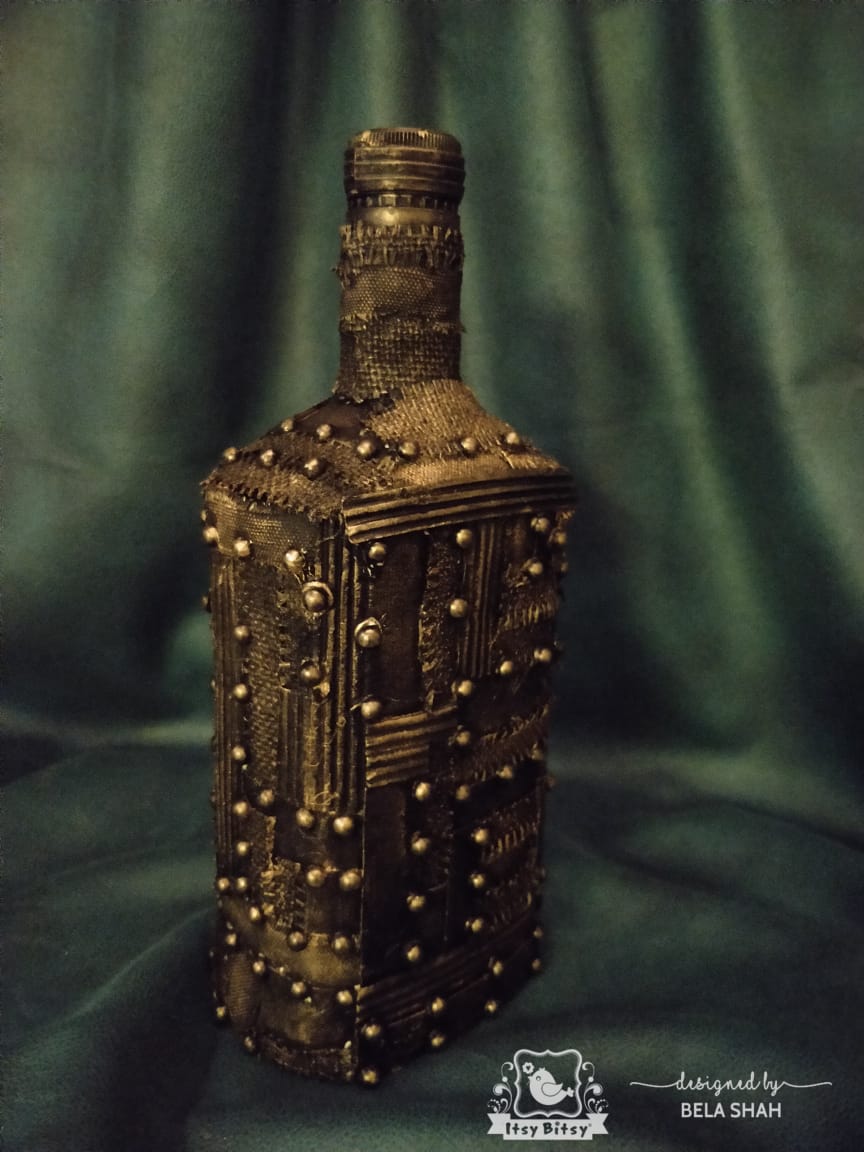
I am showing you the pictures from all the different angles to have a better understanding of how the overall look is achieved and how this bottle looks gorgeous and complete from any given angle.
I hope you enjoyed this tutorial and give it a shot . A gorgeous home decor art can be achieved using just few products from the store.
Thank you for stopping by. Don't forget to drop a comment and let me know how you like this tutorial. You can also write what you wanna see next from me!!!!
Love & Hugs
Bela


